Config App Store
- Create new App Id
- Create new App from App Store connect
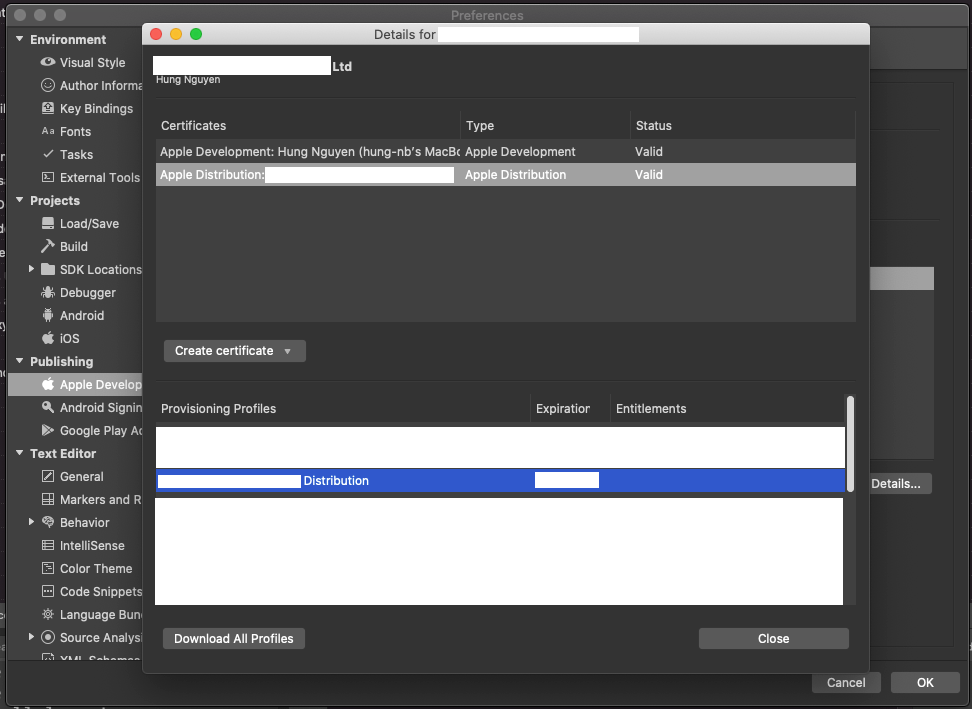
- Create new Provisioning Profile for AppStore and Development
Configure Xamarin project
Add Apple account
Visual Studio > References > Publishing > Apple Developer Accounts
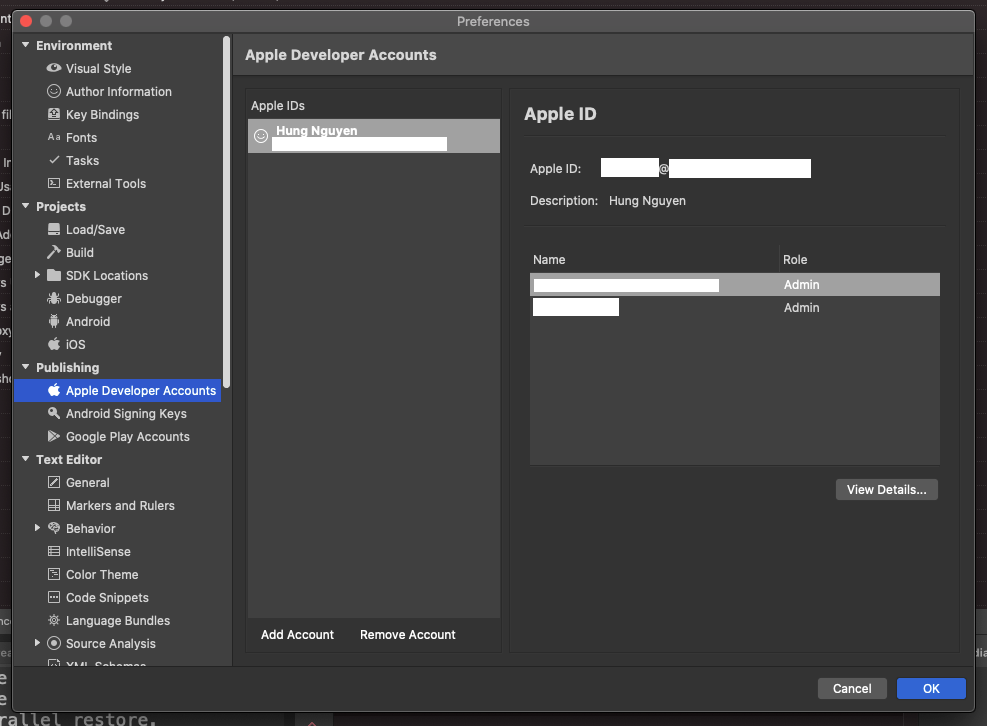
Select “View Details“
Update Bundle ID
Change Bundle Identifier to the one you like
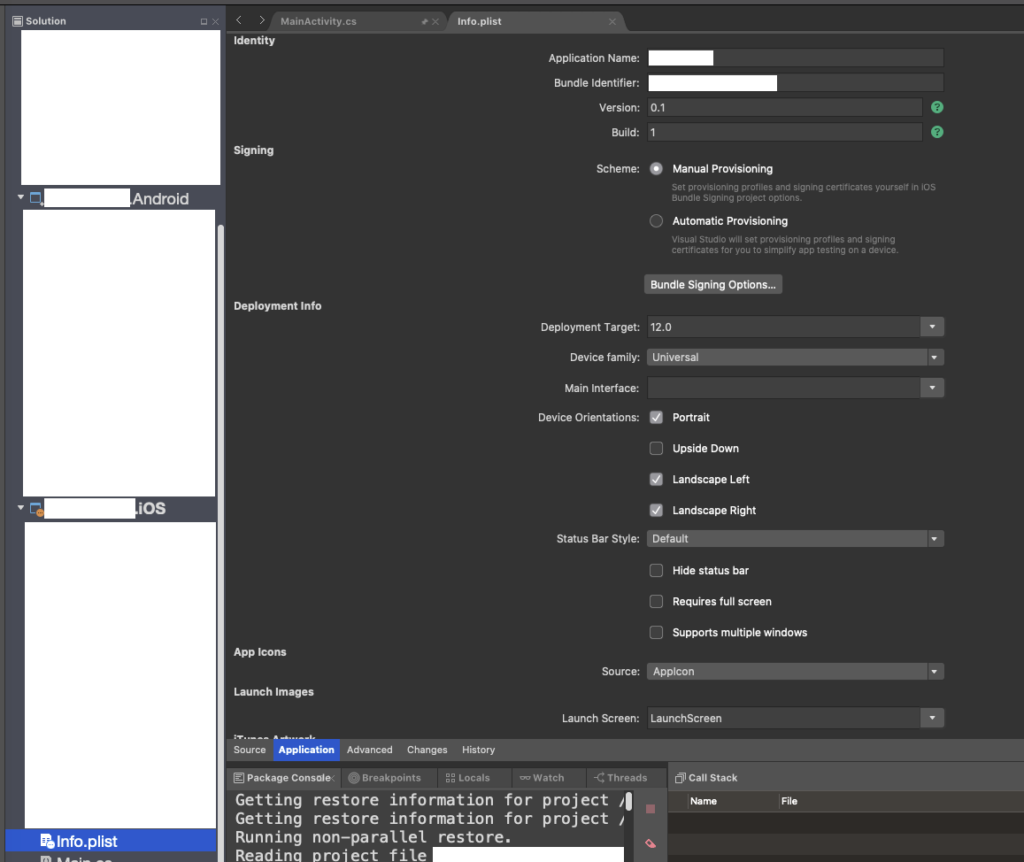
Update Signing
In the Signing section, select Automatic Provisioning as the Scheme
Update version number
Update Version string and Build number in Identity section
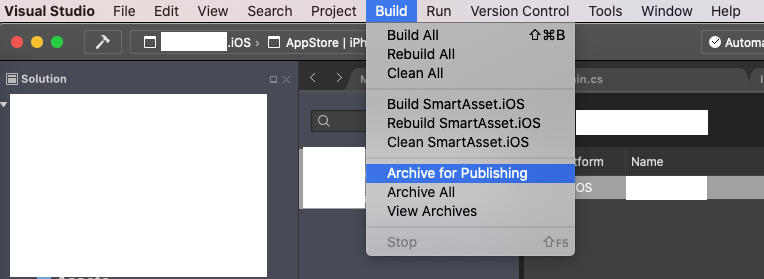
Publish archive
Menu “Build” > “Archive for Publishing“
After archiving, right click on Archive file, select “Sign and Distribute“
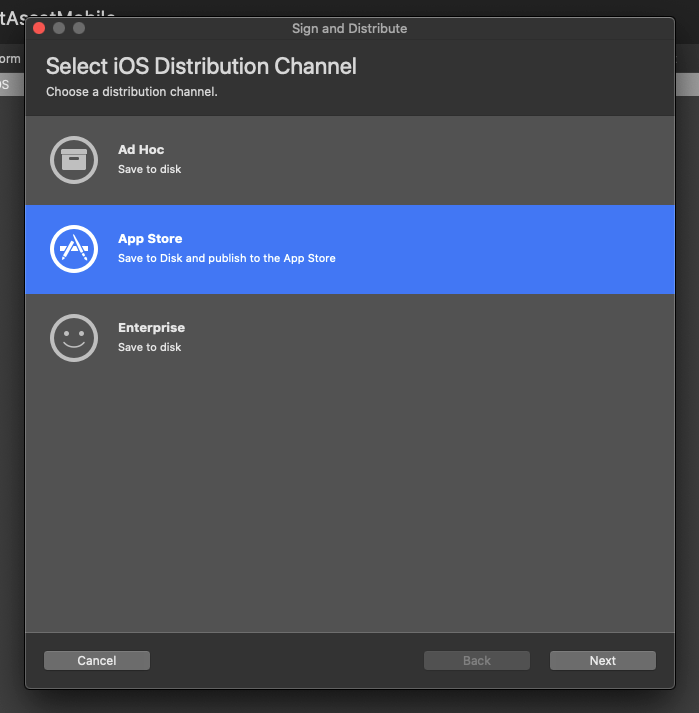
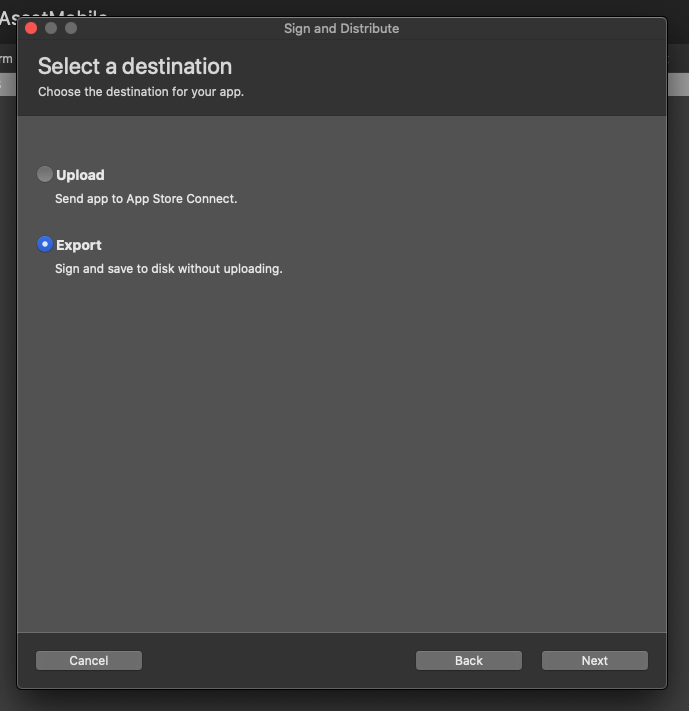
If “Upload“ doesn’t work, use “Export“ to disk and upload to App Store using “Transporter“
Leave a Reply